chassis notes
 On fabricating the chassis from the plans in the book I discovered one or two gray areas which were either a little confusing or absent or to my mind inaccurate. This is not criticism just thought it may be useful to point out.
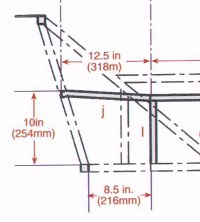
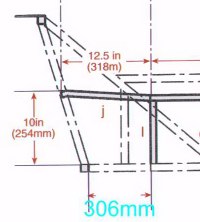
The plans show that the uprights from 19mm chs for the transmission tunnel should be placed 216mm from the rear bottom chassis tube. If you do this you will get a very awkward and ugly shape for the transmission tunnel I suggest you make it 306mm.
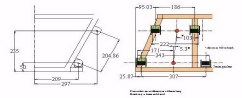
The book seems to indicate a constant width for the transmission tunnel through the middle section of the trans tunnel through to it's back, and in another drawing it shows a widening on the right namely on the plan showing bottom rails including transmission tunnel. I have gone by this plan and copied the bottom rails on the top with a big square. Dimensions for the trans. tunnel are not life or death. You may well find your self chopping and changing them to suit your axle/prop shaft selection. Just remember to keep the lines as square as you can for paneling in later on. Also worth noting is that on the race cars an extra diagonal is in place incase of propshaft failure (could make a mess of your legs) I can see no reason to not include this in the construction of a road chassis.
(If you have been to the for sale page you will see items relevant to this.)
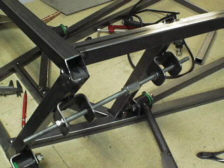
The correct castor angle can be calculated through trig from the dimensions in the plans or you could follow the cad pics sent to me by Merlin from the locost builders forum. It is best to do this on flat surface where you can mark up long line to match the centre line of the chassis with another line at the front end perpendicular to it a big T. If you lay the shassis on this taking a centre line through the chassis and with the end of the chassis on the other line you can then use your squares and rules to transfer the dimension from the plans to your brackets. Easy eh?
The following tip was sourced from http://www.locostcarclub.co.uk if you use this device to align your brackets remember you will need to remove or leave till after fu1 and fu2 boxes for bottom brackets.